1/3cupchopped red onionrinsed under water and drained
1large avocadopeeled and diced
1Tbspfresh lime juice
1Tbspolive oil
Instructions
In an 11×7-inch baking dish whisk together olive oil, lime zest, lime juice, garlic and season with salt and pepper to taste (a fair amount of each).
Place salmon in baking dish, cover and allow to marinate in refrigerator 15 – 30 minutes, then flip salmon to opposite side and allow to marinate 15 – 30 minutes longer.
If you would like to get your own full-blown copy of our “Super Foods” eBook jampacked with information and suggestions…..
1.Preheat oven to 400°F. If using a grill, preheat it to medium-high. Discard the outer leaves of the Brussels sprouts and trim the bottom of the stems. Slice them in half and lay them in a single layer on a non-stick or lined baking sheet. Drizzle a couple tablespoons of extra virgin olive oil over the sprouts, sprinkle with some salt and freshly ground black pepper, and toss to evenly coat.
2.Place the baking sheet on the top oven rack and roast for 16-20 minutes or until nicely browned. If using a grill, place the Brussels sprouts on a grill rack and grill for 8-10 minutes on each side.
3.While the Brussels sprouts are roasting, place the balsamic vinegar in a very small saucepan and bring it to a boil. Reduce the heat to medium-low and simmer uncovered for about 15 minutes or until it is thickened and lightly coats a spoon.
4.Arrange the Brussels sprouts on a serving platter, drizzle with the balsamic vinegar reduction and sprinkle with the crumbled bacon. Serve immediately.
In Part one of this blog, we spoke about early specialization, Preparation for the future and reducing risk of injury. Today we will go over the other more looked over benefits of strength training for female athletes!
3.
Increases in Strength
Developing an
athletes strength capacity can be significantly enhanced through a program that
uses a variety of forms of resistance training. The ability to coordinate
movement and to efficiently recruit muscles in synchronized action are two of
the main reasons for the strength improvements. As children age, this is a
natural pattern of development but using forms of strength and conditioning
training can expedite the process. Individuals who train twice per week, on
average, have 33% higher strength gains than their once session per week
counterparts. Stronger athletes perform better.
4. Enjoyment
in movement and physical activity for a lifetime
Through
research, we know that those individuals who enjoy movement and physical
activity are those who are the most likely to continue a healthy exercise
lifestyle through their lives. It is much easier to enjoy physical activity
when you move well and with no pain during the process. Strength and
conditioning is a way to learn how to positively impact movement quality
through mobility and movement training. All movements in our lives have an
optimal way to be performed and the better you are at performing those
movements, the better chance you have of continuing those movements.
As a final
note; Always keep in mind that social pressures are a large part of a female
athlete’s psyche and anything you do to take care of the body you must take
equal care of their mind. An example of this is something I hear far too often.
Whenever there is a young girl in the gym, the parents passing through tend to
make a comment along the lines of “aw, she is so cute” …. Well she is here to
work hard not to look cute. By saying that, you teach her to prioritize looking
cute in the gym over the hard work they are putting in and devaluing that work
all at the same time. Value the work your girls are putting into the gym and
not what they look like while doing so. These pressures are difficult enough to
deal with outside the gym and I don’t want that pressure walking in with them
to every session, practice or game they attend.
Come into SST and see the difference our athlete training programs can make to you or your daughter!
If you are interested in learning more about your preparation and reducing injury risk please email us at bskinner@sstcanada.com
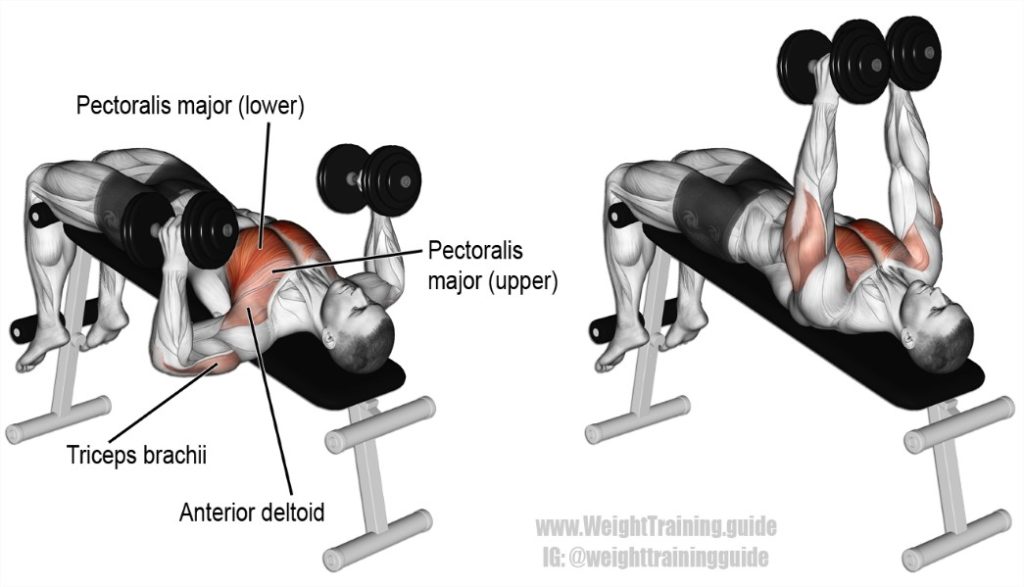
There is a small but mighty trick to break through, switch to a DB chest press and get the most bang for your buck. The strongest, smartest lifters don’t bench-press with their upper arms 90 degrees from their sides; they tuck their elbows in on the descent to get more power and reduce the risk of shoulder injury. To get fluid and comfortable doing this, performing the neutral to pronated grip bench press for eight to 12 weeks. Switch back to the traditional barbell while keeping in mind the cues of tucking your elbows. Watch your bench number skyrocket.
HOW TO DO IT
1. Grab dumbbells and lie back on a bench.
Squeeze your shoulder blades down and together and arch your lower back.
Position the weights at the sides of your chest with palms facing each other.
2. Press the weights straight overhead, while
rotating your grip to the pronated position and vice versa on the way down.
WHY IT WORKS
Pressing with the palms
facing each other, rather than pointed toward your feet, will naturally cause
you to keep your elbows close. This takes excess pressure off your shoulder
joints and increases your mechanical advantage, allowing you to lift
significantly more weight. Your chest is also responsible for internal rotation
and therefor you will get better activation of that muscle group.
Come in for a FREE demo with our MaxFit class!
To book please email us at sst@sstcanada.com and we’ll get you scheduled for your demo.
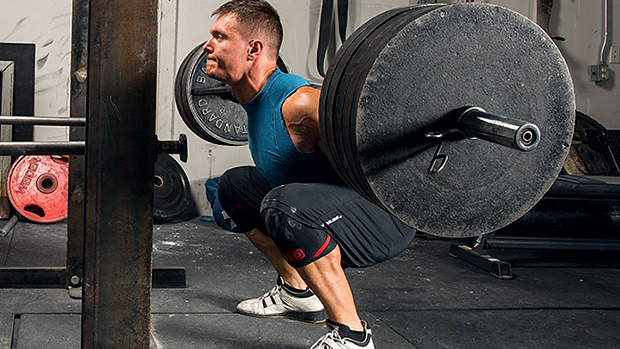
The squat is one of the most well known, if
not the most well-known exercise for developing lower body strength. One of the
age-old questions in the athletic community and strength and conditioning world
is how low should I go? This post aims to delve into this topic and provide
insight into how low one should go when squatting.
Early
research into the squat suggested that with increased knee bend there was
increased stress on the knee joint and while this is partially true (as
tibiofemoral and patellofemoral compression increases with increasing knee
angle), the maximal mean peak shear forces reported are much lower than the
patellar and quadriceps tendons can withstand, and therefore while these forces
increase with squat depth, they are within ranges that would tend not to
significantly damage these tissues in an healthy individual. Furthermore, peak
anterior shear forces occur from 0 – 60 degrees of knee flexion, making the
anterior cruciate ligament (ACL) most susceptible at this range, and these
forces decrease with increased squat depth. Posterior shear force begins at 30
degrees flexion, with peak forces reported at 90 degrees of knee flexion and
decreasing below 90 degrees of flexion. Therefore, while it is true higher
forces exist at greater knee flexion, deep squats decrease stress on the ACL
and PCL compared to partial squats of 90 degrees knee flexion or less.
While
the knee joint is the most commonly addressed joint when talking about squat
depth, the loading mechanics of the spine also come into question. It has been
shown that with increased forward lean, forces on the lumbar spine are
increased. Furthermore, in lumbar flexion or excessive lumbar extension we also
see these forces increase with the squat. In terms of the effect of squat depth
on the spine, if a neutral lumbar spine and forward gaze can be maintained this
is more important than squat depth itself. Furthermore, it appears front squats
and low bar back squats provide less stress on the spine than high bar back
squats.
When
we look at muscle activation, deep squats tend to activate hip musculature more
than partial squats, so if we are trying to maximize the strength of our hip
musculature (including our most powerful hip extensor gluteus maximus) deep
squats with a wider stance and feet slightly turned out (anatomical position)
are preferred, as partial squats up to 90 degrees maximize quadricep
activation.
Overall there are many benefits to deep
squats, but this is only if we can perform deep squats with proper form and
technique. Likewise, there may be some scenarios where deep squats are
contraindicated such as those with previous PCL injuries or patellofemoral
disorders. Furthermore, squat depth should be consistent with individual goals and
proper technique and execution needs to be maintained. Individuals should seek
advice of an exercise professional on squat technique and should have an
assessment done to find what is right for them in their exercise program.
However, if you can squat to depth below 90 degrees it seems to be beneficial
to athletic development and may even be less stressful on supporting structures.
Ok if you are back reading then you really want your son/ daughter to get faster.
Before I get into what I believe very important for stop/ starting I ask these questions:
Does your son / daughter:
Stand tall when changing directions
Slow changing directions
Takes extra steps when changing directions
If you are witnessing this then
you are probably deficient in ECCENTRIC strength. What the heck does this mean? Eccentric contractions of a muscle is described
as when the muscle lengths under tension.
A simple example is when you lower the weight on a bench press.
So what does this mean in running
or changing of direction? It means we can work on all the form drills you want
(yes you get better to some degree) but BNAG for Buck you must strengthen your
legs eccentrically. One of my favorite
two methods is:
Eccentric squats- lower the weight for at least 6 seconds down and then explode up ad fast as you can (please do not under estimate how difficult this is) Please start with a lower weight than your regular squat.
Trap bar on elevated box- 6 seconds down as well – the difficulty of this exercise is much greater than a regular trap bar we we increased the Range of motion.
Try one of these exercises for 3 weeks and you will certainly see some major improvement when combined with a great speed program If you like to discuss please contact me as I am offering a 20-minute complimentary speed consultation on the phone.
Offensive line play is one of the hardest
positions in sports to truly master because of the amount of technique that is
involved with every movement during a play. When coaching OL one of the most
important parts of coaching OL is having a great stance! It goes back to the
old saying, “if you start wrong odds are you are going to finish wrong.” What I
will go thru in this blog is my key points on having a great stance.
Foot Angle
Gone are the days from Pop Warner where you
were taught to have your toes pointing straight up the field! Let’s talks about
a Right Handed stance; the left foot should be slightly opened, point towards
11’oclock. The right foot is a part of the prop leg, the foot should be more
angled at approximately 2:00. This will allow you go get your whole back foot
in the ground!
Neutral
Height in Stance
People think lower is better which is not
true all. I will say this, the lower you can play the better your going to be.
Some people’s anatomy won’t let them get to a certain depth. One way to figure
out how low you should be in you stance is to simply come off the football. If
the hips moves jagged then you’re too low. If the hips move nice and smooth,
then you are perfect. I always teach this to my guys so they understand what
goes into building a base.
Stagger of Stance
Pop warner coaches teach toe lined up in
the instep. Anatomy wise it really doesn’t make sense; it doesn’t allow you to
open up your hips and play with power. The easiest way to figure out how much
stagger to play with is this simple test. Stand with your feet just outside
shoulder width. Have someone gently give you a nudge, when falling backwards
catch yourself with the foot that goes back in your respective stance. Wherever
that foot falls is where it should be, in relation to your post foot
This is just the basics of how your stance
should operate, I could go on about this for hours, but I wont! Like I said
before, “if you start wrong, you will finish wrong.” Please put time and effort
into your stance and base, it’s the most important aspect.
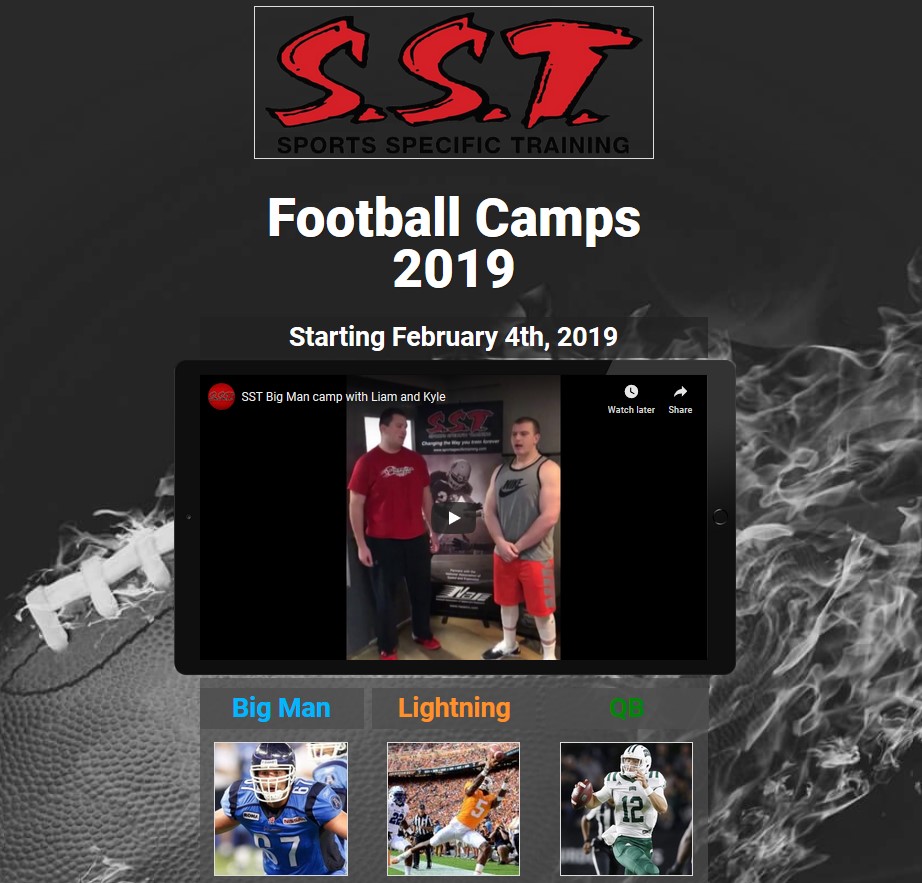
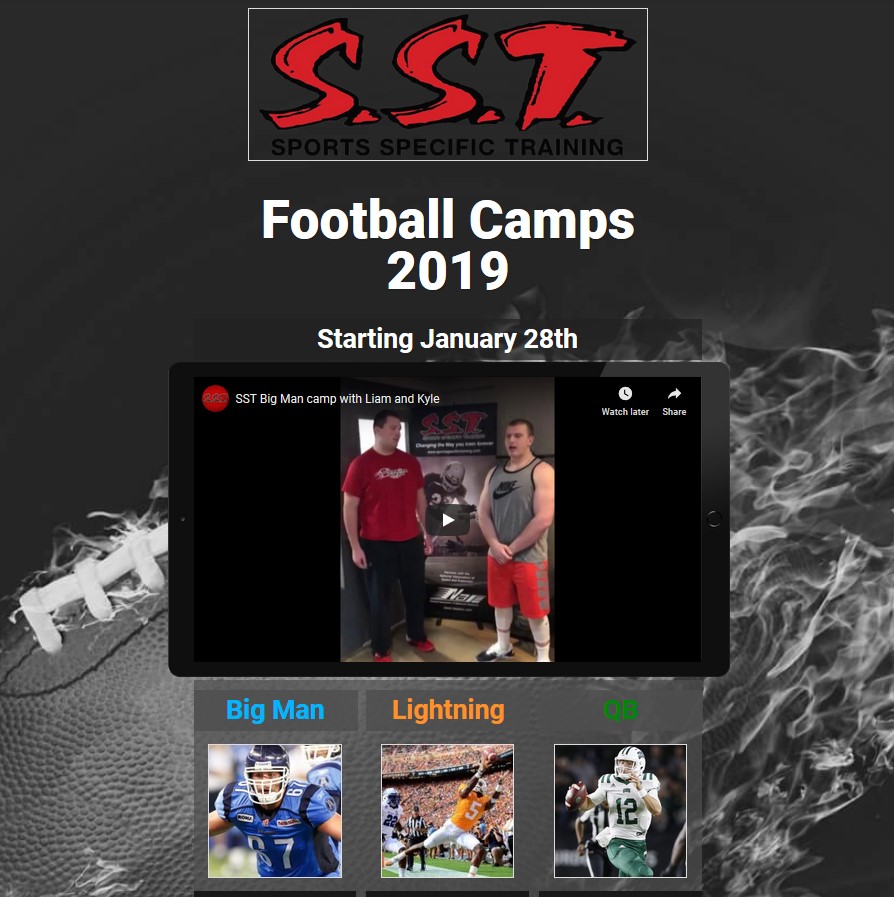
If you would like to learn more about OL play come to our big man camp starting February 4th!
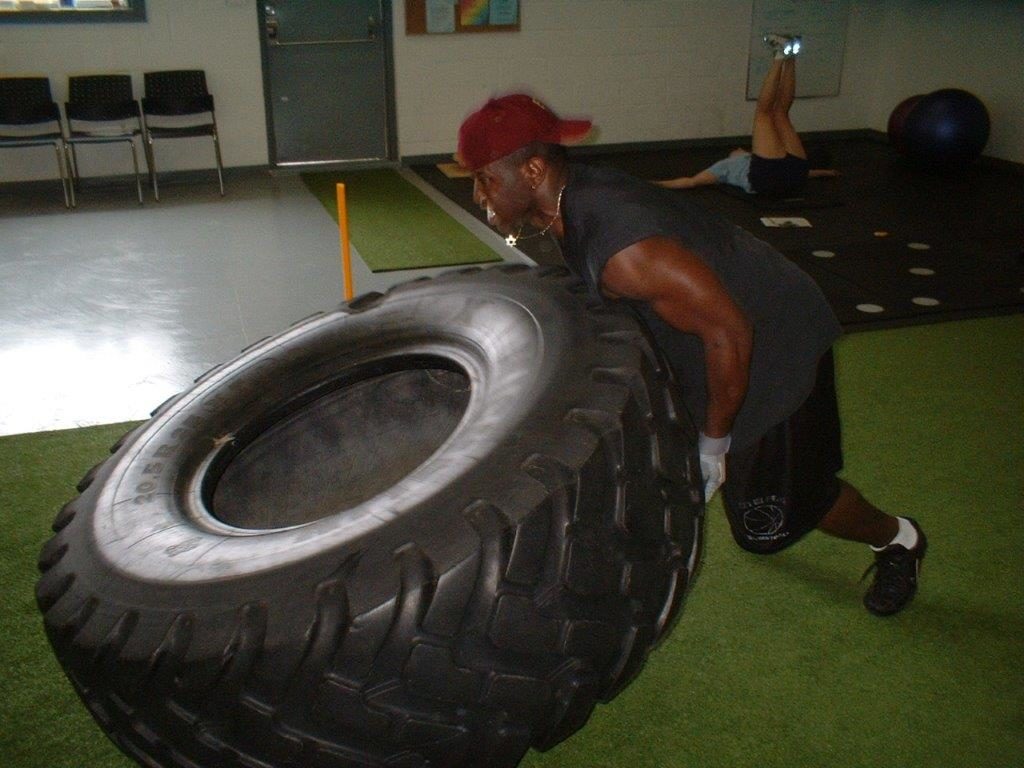
Conditioning Offensive Line and Defensive athletes is harder than you may think. Naïve people think that you can condition and OL athlete just like a skill position, but they couldn’t be more wrong. Skill positions run a very long distance on most plays without must strain. OL and DL athletes run short distances with a lot of strain. We as strength coaches must know this information and use it to execute the training program! Here are our 3 favourite ways to Condition OL and DL athletes.
Tire Flipping
This is a great way to get Big Football Athletes CNS going. Twenty seconds of tire flipping is a perfect amount of time to get them firing on all cylinders! This is a great way to develop strength and conditioning in the lower back which is very important for hand down athletes. One note for this is when they flip the tire they need to sprint around it so they are working at 100% the whole rep.
Banded Runs
This is easily one of my favourite ways to condition big boys. I like to keep the distance short, 10 to 15 yards maximum. Put a resistance band around their waste and make them work. 60-70 percent resistance is the perfect amount. Tell the athletes to start out of their stance and the fly. With OL what I like to do is start on a “Zone Track” then make them run after the fact.
Jumping
I can’t even begin to tell you how important this is. The name of the game in the trenches is all about who can apply more force through the ground to move laterally and vertically, with strength. Jumping teaches us this perfectly. You can train it numerous amounts of ways, box jumps, bounding really anything where you are getting lift! This really teaches them the importance of bend in their legs and where power comes from along with the conditioning.